 Loading... Please wait...
Categories
- Ben Kings Rules
- Civil War Scenario Books
- ESR System
- Hayland Terrain Wargames
- Land
- WWII Posters 15mm / 25mm
- Napoleonic Scenario Books
- Flags-a
- Great Battles with Flags
- Metal Base Moving Stands
- GREAT DEALS!
- Painting Army Books
- Victrix Products
- 10mm Miniature Flags
- Artizen Design Miniatures
- Bad Squiddo Games - Female Miniatures
- Perry Miniatures
- SAGA / Gripping Beast
- Warload Games
- Download Catalog
New Products
-
 $9.45
$9.45
-
 $8.40
$8.40
-
 $9.45
$9.45
-
 $9.45
$9.45
-
 $9.45
$9.45
Our Newsletter
- Home
- Ben Kings Rules
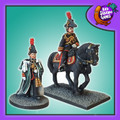
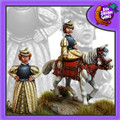
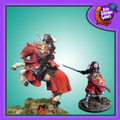
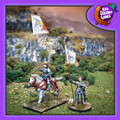
- SWS-02 Judgement of Gods
- Home
- Ben Kings Rules
- Land
- SWS-02 Judgement of Gods

Product Description
Avaiable in Digital Format also
Small War Presents
The Judgment of God
An Ultra-Fast Set of Medieval Rules
By Ben King
Introduction: In the early years of miniature wargaming medieval rules were short, simple and easy to play. Unfortunately some of them were adapted from Napoleonic rules that ignored the realities of medieval warfare. The Judgment of God recaptures the spirit of those short, fun-filled rules while maintaining the accuracies that today’s wargamers expect. On the next 3 pages are rules for the type of warfare that existed throughout the period. After the rules are illustrated combat examples and the Combat Cards with the all the tables needed to play Judgment of God. As long as the scales of the figures and the basing systems are consistent they’ll work with these rules.
Preliminaries: You will need model soldiers, terrain, a tape measure and 2 differently colored 10 sided dice. One d10 has a range of 1-10. 2 d10s are d% and give a range of 1-100. Soldier types and classes are listed on Combat Card A. Class differences are demonstrated by d10 modifiers for combat and morale, the Unit Reaction Time (URT) and fatigue points listed in the Class Mod Table on Combat Card A.
The Game Turn: The game is divided into turns and each turn has 4 parts. Part 1 is movement and fire. Each side rolls d% and the high scorer must move first. After the high scorer (player 1) moves, any eligible war engine or unit on either side may fire. War engines always fire first. After player 2 moves, remaining eligible engines/units may fire. Engines and units can fire only once per turn. Part 2 is Melee (hand-to-hand combat). Part 3 is unit Morale and Part 4 is Army morale. Casualties are removed as they occur.
Terrain and Visibility: Hills are made of contours to ease movement and placement of figures and artillery. A contour should be at least 75% of the height of the figures used. Woods are represented by colored mats with model trees; rough terrain by scrub and rocks and swamp by pools and scrub. Trees and rocks are ornamental and may be moved to facilitate movement. Visibility in clear weather is 60”. It increases 5” per contour for a maximum of 15”. Visibility is blocked by woods, hills, tall grasses, and building. For simplicity, the height of everything is measured in contours. Each story on a building is a contour. Light wood are 2 contours tall and heavy woods are 4 contours tall. Cornfields, wheat fields and scrub are 1 contour tall. Observers must be 2 contours above an intervening contour to see over it. Otherwise there is 4” of dead space behind it. Units behind a contour cannot be seen and take no casualties from enemy fire. Visibility in light woods is 20” and heavy woods 10”. However, an observer outside light woods can only see 4” into light woods or 2” into heavy woods.
Movement is measured in inches. The maximum movement rates for all terrain are listed in the movement table. Rough terrain means any muddy or poor ground. Players may move their units shorter distances or not at all if they wish. Formed infantry and cavalry are allowed to charge every 4th move but only to engage the enemy. Mongols may use the charge or run move every 4th move, regardless. They may also split their moves moving part forward to fire then withdraw. Open order and skirmish infantry and cavalry run every 4th move. A URT is the time it takes the unit to accomplish something. For example it takes a URT to change formation which means knights takes a full move while the Swiss take ½ move. Some activities take more than 1 URT. All of the activities are listed in the URT Table on Combat Card A.
Formations: Except for the Swiss and the Mongols all troops operated in a formation one or more ranks deep that was very cumbersome. Units were in close order for combat or open order for missile fire. Facing any way but forward was very difficult and changing to a different formation almost impossible. Infantry could move forward only slowly and maneuver was hardly tried. These formations are deployed one rank of figures across and as many deep as required. The Mongols and the Swiss moved fast, maneuvered skillfully and changed formation at will. Asian horse archers operated primarily in skirmish formation. Any unit must be in good order to move and fight effectively. Formations that are slightly disorganized are “disordered.” A unit is disordered when it has just waded a stream; finished a melee; or when it has charged and not reached its objective. It needs 1 URT without moving to reorganize. Disordered units in the open can’t charge and fight as if taken in flank. Disordered units defending barriers & houses fight with an unmodified LF and get no advantages outlined in the melee matrix. They get no positive modifiers. A unit is badly disorganized or “muddled” when it is forced into a friendly unit; runs into one by accident; or is forced into a melee while wading a stream or river. It takes 3 URTs of the lowest class to untangle a muddle and none of the units may fire. If attacked in melee, they fight as if taken in the rear. Units will sort themselves out even during melee.
Casualties and Damage are decided by a combination of the attacking unit’s Attack Value (AV) compared to the target’s Defense Value (DV). Cavalry and infantry AV is based on the number of figures plus the class modifier and a d10 roll. Artillery AV is based on points, the class modifier and a d10 roll. If the AV equals or exceeds the target’s DV there is a hit. Target units lose figures while guns, horse teams and buildings lose points. If the LF is 2X the target’s DF the target loses 2 figures/points, 3X, 3 figures/points, etc. Basic AVs are on Combat Card A. Cavalry, infantry and artillery all have a DV of 10. DVs are in the Values Table on CC A. The class modifier is never added to the DV.
AV and DV Modifiers: The AV may be modified to reflect a unique tactical situation by adding points to the AV and multiplying the result by the factor shown on the combat card. For example a veteran 10 man infantry unit charging an enemy unit in flank makes a d10 roll of 6. In the Melee Modifiers Table on Combat Card A, the notation for a flank attack is 4(AV+5). This means 10 (the number of figures) + 1 (veteran status) + 5 (the d10 roll) + 5 (flank modifier) = 21. This is multiplied by 4 for a result of 84. The target unit’s DV is 10 and the attacking unit causes 8 casualties. Be sure to include all the appropriate modifiers including the class modifier when modifying the AV.
War Engines and Bombards: were mainly used for sieges. However, there were some instances where they were used in battles so they are included here. There are 2 types of engines, the ballista which throws bolts and the catapult which throws stones. There is a light and heavy version of each type. To employ a war engine first measure the range and roll the required number of d6. For long range roll 1 d6, for medium 2 d6 and for short range 3 d6. Do not add or subtract class modifiers to the score only the range modifiers. A 6 is required to hit. Once a hit is scored, roll a d10 and use the engine’s AV to determine casualties. Only war engines can damage buildings. If the hit exceeds the DV of the building the engine does 1 point damage to a stone building and 3 points damage to a wooden one. When the points are gone, the building collapses and the points of the building are used as an AV against the troops inside. For war engines wagons lagers are considered wooden buildings.
Wagon Lagers were used by the Hussites in the early 15th century. The Hussites usually formed the wagons in a circle or square on a hill forcing their enemies to attack them. Some of the wagons held light bombards. There are 12 figures per wagon. Some may be armed with bows and they fight as if they were men-at-arms in hard cover. Cavalry attacking a wagon lager is the same as attacking a hedgehog.
Bowmen: Moving light bowmen fire only the first rank of the formation at full LF with -2 on the d10 roll. Stationary light bowmen fire the first rank and 50% of the second rank at full LF. Moving Heavy bowmen fire only the first rank of the formation at its full LF with -2 on the d10 roll. Stationary Heavy bowmen fire the first rank and 50% of the second rank (see above) and the LF is doubled. The English Longbow was a volley fire weapon. A trained archer could fire 6 shafts per minute. At a range of 8” or less, the LF of English longbow, is tripled and +3 is added to the d10 roll for casualties. A 2nd rank must have at least 50% of the figures of the 1st rank to count as such. This applies to all weapons. Skirmishers always fire with their full LF but only the stands in range count. Loading requirements of the weapons apply. Skirmishers get no advantages for enfilade fire or multiple ranks.
Crossbows & Handguns: Moving light crossbowmen fire only the first rank of the formation with -2 on the d10 roll. Stationary light crossbowmen fire at full LF. Light crossbows take 1 URT without moving to load. If Stationary crossbowmen are in 2 ranks they may fire the first rank every move without worrying about the reloading penalty. Moving heavy crossbowmen fire only the first rank of the formation at full LF with -2 on the d10 roll. Stationary heavy crossbowmen fire with the LF doubled. Heavy crossbows take 2 URT without moving to load. If Stationary crossbowmen are in 2 ranks they may fire the 1st rank every move without worrying about the reloading penalty. Handguns have a short range and take 2 URT not moving to load. They lose 2 points if they are moving. Armor is no protection from handguns so the target DV without cover is 10.
The Mongols and Other Horse Archers: The Mongols were superior mounted archers and could fire on the move with no degradation in accuracy. They can fire to the left, the front and rear with a +1 0n the d10 roll. Firing to the right is a -2 on the d10 roll. They also carried a heavy bow for dismounted action. When they dismount they become heavy bowmen capable of operating in skirmish or in open order. The Mongols and other Asian horse archers usually avoided close combat if they could. After they conquered parts of China the Mongols included Chinese heavy cavalry in their armies. These were as good as knights and much better disciplined. Some middle-eastern light cavalry were also excellent horse archers while others like the Bedouin were poor shots. European horse archers have light bows & crossbows. Mounted, they halve their LF when firing stationary. They subtract an additional 2 points (-2) when moving. Dismounted they're light archers.
Cover and Armor: 4 types of cover are listed in the Cover Table. Add the appropriate modifier to the target’s DV. For example, infantry in a wooden building has a DF of 10+3=13. If the cover doesn’t protect the flanks/ rear of a unit, the flanks/ rear are open. There are 2 kinds of armor. A soldier who has full protection of armor and/or chainmail is armored. Light Armor consists of helmet and breastplate. Anything less means unarmored. Armor is added to a DV the same way cover is for melee, bows and crossbows. Armored troops behind cover ad both the armor bonus and the cover bonus.
Firepower modifiers: When units fire at each other each rolls a d10, add its class modifier and situation modifier listed in the Firing First Table. The -3 for moving doesn't apply to Asian horse archers or Mongols. The high score fires first. Ties fire simultaneously. The effect of the armor on missile fire is in the Missile Fire Table. Missile troops firing at the flank or rear of an enemy Enfilade the target. The get a bonus of 3 to the AV and the result is doubled. 2(AV+3). Missile troops a contour higher than friendly troops may fire over their heads. For the effect of firepower in woods see “cover”. A unit must be 2” from the edge of a wood before it gets the cover mod. Range in light woods is ¾ that of normal and in heavy woods ½. Disordered missile troops fire the 1st rank only and subtract 2 from the d10- roll.
Melee (Close Combat) occurs when the stand of an advancing unit touches an enemy stand or position. Only a Steady unit can initiate melee. Only a Steady or Shaken unit will accept melee. When a unit that hasn’t yet moved is attacked and the attacker has moved less than 1URT of the target unit, the target must accept melee as it stands. If the attacker takes more than a URT, then roll a d10 and add the unit’s class modifier and use the Melee Counter Rolls Table. If the score is equal to or higher than that in the table the unit may change to a more advantageous position, formation or counter-charge. Skirmishers may withdraw. Units on a side that has already moved have no options. Pikes and hedgehogs vs. cavalry and flank/rear attacks count 2 ranks and all others count 1. Artillery batteries count all their points. The relationships of the various formations are in the melee matrix. Add the figures/points to the appropriate modifiers and the d10 roll to find the LF. Each side removes its casualties. On move 2 of a melee, all the troops of a unit become involved. Flank and rear advantages last only 1 move then the melee becomes general and all figures of each side take part. Pike units taken in flank fight as regular infantry on the 2nd move of a melee. Units entering a melee in progress get their charge bonus but no flank or rear advantages. Modifiers for assaults on buildings and barriers are in the Melee Modifier Table. A unit that lost a melee rolls a d10 and adds its Class modifier. 6 or less means it lost its banner. Advancing/charging units that fall below “Steady” during and advance /charge may not close.
Fatigue: A unit gets fatigue points (see table) for each move in melee. At the end of each move roll a d10 (don’t add the class mod). If the score doesn’t equal or exceed the total of fatigue points, the unit falls back 4”. If an opponent stands, subtract the number of figures from the unit that withdraws from the unit that stood. Add that to the unit’s class mod and a d10 roll. If the score is 20+ the victorious unit advances and the melee continues. A general/staff officer can prevent a unit from moving forward. With no pursuit, the melee is over. A unit that falls below a level, also falls back 4”, its opponent automatically follows and the melee continues. If both fall below a level both fall back and the melee is over. Fatigue lasts only for the melee. There are no fatigue points given for a flank/rear attack or its equivalent. There is no fatigue for hedgehogs or wagon lagers. In wars where no quarter is given such as religious wars and those with the Swiss and Mongols, there are no fatigue points. The melee lasts until someone routs.
Effectiveness: There are 4 levels of effectiveness listed in the effectiveness table. At the end of a move in which a unit drops below a level, make a rally roll for the unit with a d10 and add its Class mod to see if it gets figures back. These are lightly wounded returning and may return the unit to its previous level. Rally rolls are even made for units fighting a melee. The Class effectiveness table shows how each unit reacts. For example, knights remain steady until they take 75% losses and rabble rout after 25% losses. Fanatics remain steady until they rout.
Leadership: Each unit has 3 “leaders” that are not part of the actual figure count. When a unit takes a casualty from missile fire or melee, roll d%. A score of 86+ means that the unit suffered a “leader” casualty in addition to a figure casualty. For each leader lost subtract 2 from the d10 roll for rally and melee counter rolls. Commanders and aides represent command and control. For the army, there is an overall commander and a sub commander for every 5 - 8 units. Each has an aide. A commander or aide may add points to a unit’s rally if his stand is touching the unit’s. The points are in the Rally Roll Modifier Table. Only 1 officer at a time affects a unit. If a Commander/aide is with the unit when it takes a leadership casualty, he is the casualty. When the army commander is a casualty, all units within 18” that have to make rally rolls that move lose 4 points. The unit the commander was with loses the points for the rest of the game.
Victory Points: Prior to a game, establish the number of units/guns in each army and assign 1-4 points to each valuable objective on the table. At the end of the game find the number of units and guns in each army that are routed or destroyed and find the percentage remaining. This will give you the points in the Army Effectiveness Table. Then add/subtract the appropriate modifiers in the Army Modifiers Tables. Once you have the total roll a d10 and use the Rally Rolls table to get additional points. Compare the total score of each army and the high score wins. The courses of action listed are for games that may be continued.
Also avaible in Ditgital Form
“With Rules This Easy I Might Have Won at Bannockburn”
Edward II of England
Have fun!
All illustrations and graphics to include cover art are property of the author. I owe a debt of thanks to the following individuals who helped play test the rules: Wayne Gerdes, John Kaiser, Rich Kardos, Mike McVeigh, Howard Meissel, Bill Melgaard, Brent Romanick, Colin Romanick, and Paul Sullivan.

Add to Wish List
Related Products
-
 SWS-01 Gallant Grenadiers $12.60
-
 SWS-03 Legionnaire $12.60
-
 SWS-04 Pickelhaube & Kepi $12.60
-
 SWS-05 Plucky Pikes $12.60
-
 SWS-07 Valiant Voltigeurs $12.60